How to realise flawless event registration
80% of all B2B events aim to improve or maintain long-term relationships with business clients. Unlike B2C events (like dance festivals), B2B events are mainly about who is coming to the event, not how many. Therefore, organisers ask their invitees to register. This registration process might look like a one-time, functional action in the invitation process; however, B2B event registration can be very challenging.
The registration process can become complex because of different target groups and tricky schedules with multiple sub-sessions. After registration, your next aim is to stay at the top of your mind. After all, you want to ensure people will come to your event!
Good event software will allow you to automate many aspects of the registration process. Spotler Events wants to support event professionals in creating high-quality events. Therefore, we created this white paper containing practical tips and tricks for flawless registration.
More than an RSVP
Before we start an in-depth explanation of the best registration settings for complex events, it’s good to consider the role events play in your company’s overall strategy. Events can be an essential communication tool in a long-term relationship with your customers. Every invitation, reminder, and event is a touchpoint for connecting to your valuable customers. You want to manage them smoothly and professionally.
Registration is the last (and maybe even the most important!) piece of the puzzle. To achieve flawless registration, you need to align all the elements. Here’s a summary of what a good communication flow should look like:
“To achieve flawless registration, you need to align all the elements.”
Mailings
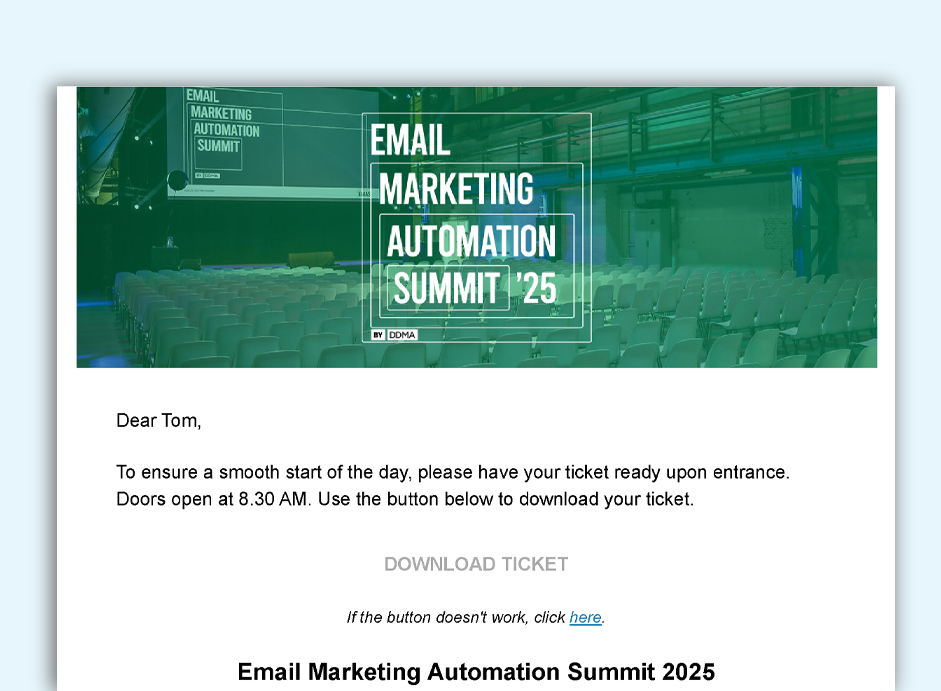
A good communication flow is the start of a successful event. Usually, your first contact with your invitee is via email (a save-the-date or the official invitation). Therefore, emails deserve care and attention. They should look appealing and contain easy-to-read, unique content relevant to your invitee. Experiment with different settings, layouts, and calls-to-action to determine what works best for your recipients.
Carefully prepare and schedule the complete email flow. From the ‘save the date’ to the ‘thank you’ email, communication with your recipients is efficient and transparent. In the end, this will contribute to an accurate list of attendees and a lower no-show rate for your event.
Tickets
Do your invitees have to buy a ticket to attend your event? How many different tickets are available, and for whom? Your event’s ticket sales are directly related to its registration. Develop an appropriate ticket strategy for your target audience to reach the desired number of registrations.
Website
A well-designed website contributes to your visitors’ overall event experience, leading to a higher registration rate. Make your invitees feel welcome by creating a clear website with fresh content, beautiful images and colours.
Remember, your event website is more than just an online registration form; it’s the ultimate place to provide all the essential event information and engage your audience, even before the event starts! Your emails and event website will influence your invitees’ decision to register for your event.
Survey
Surveys are the ultimate tool for evaluating your event. Your attendees hold valuable information, and understanding this will help you achieve your goals and create even more impactful events in the future! Surveys are a powerful tool when they’re conducted and set up correctly.
The trick is to get all the information you need, with as few questions as possible. After that, interpreting and analysing the data is key. Gather more skills for building a good survey.
Event registration is not a single sign-on moment. It’s a crucial aspect of a bigger communication flow. All elements of the communication flow (mailings, website, surveys) are interrelated and contribute to the same goal: making sure the right people will attend your event. And that all starts with flawless registration. Let’s have a closer look at that.
Determine the framework
Event registration that involves different target groups and multiple sub-sessions can become quite complex. Setting up a clear framework upfront can help you manage the registration and maintain an overall view.
5 essential questions
Before you start creating a registration form, determine the complete registration process by answering the following questions:
- Who can register?
- How many people do you invite?
- Can your invitee bring a guest?
- What is the capacity of your workshops?
- Will you check in your guests at the event?
Who can register?
Personalised registration is the safest option if you invite your own data list: only invitees with a personal link or code can register.
Open registration is the way to go if your event is open to a broader audience. For example, when you publish your event on social media, anyone can sign up by filling out the registration page. This is an excellent solution for generating new leads!
How many people do you invite?
It’s important to determine the number of attendees and calculate the number of invitees that lead to this number. How many people can attend your event? What’s the capacity of the venue and rooms? What happens when the maximum is reached? And what will you do when not enough people register?
Unfortunately, experience shows that on average, 50% of your invitees will register for free B2B events. And even after registrations, a 20 to 30% no-show is not a bad result. This information will help you calculate the ideal number of invitees. Are you organising a popular event? Then you might think of a waiting list to manage the maximum capacity of the event.
“Design the process carefully before sending out the invites”
Can your invitee bring a guest?
If you offer your invitee the option to bring a guest or colleague, ensure you think the procedure through. What details do you need from the guest? Will the extra guest receive a separate confirmation with an e-ticket? Or will you send this to your invitee? Design the process carefully before sending out the invites: changing the settings afterwards will create much extra work!
What is the capacity of your workshops?
Many B2B events have workshops, sub-sessions, or other flexible programme items with limited seats. Write down the registration options for these sessions. Working with multiple time slots can be challenging, especially when not using flexible event registration software.
Will you check in your guests at the event?
At Spotler, we believe checking in your attendees is necessary. It’s the only way to know who attended your event. This data is essential for follow-up: thank the people who attended and ask them for feedback! Consider calling the people who did not show up to improve the relationship. In the final chapter of this white paper, we will dive deeper into setting up the perfect registration desk.
Plan out and test your event communications
After answering these five questions, setting up the next phase of your communication flow will be easier. Write down all communication moments to collect the data you need. This includes the invitation text, registration page details, confirmation email text, e-ticket, reminders, and thank you emails.
Once you’ve covered everything, you can set up your registration page and test it. Ask your team to test as well. An extra pair of eyes helps you check whether the texts are explicit and the registration is effortless. Don’t forget to test the cancellation process!
Registration is deeply embedded in all aspects of your event: your confirmation emails, program, venue size, and on-site check-in. Good preparation for this framework prevents you from forgetting vital steps and allows you to integrate your event’s communications and production.
Achieve higher attendance rates
As illustrated, a good framework will help you set up a flawless registration process. After testing and tweaking, you can start communicating with your invitees. First step: invitation or “save the date”. The numbers will tell you if the message came across clearly in the first three days after your invitation. The following actions will help you make your event more successful.
It starts with the database
The results of your mailing list depend on the quality of your database. Make sure you prepare your database as follows:
- Clean up your database (verify if all columns are filled and check the email addresses for errors)
- Make separate lists for different target audiences.
- Add an extra column for the salutation (Mr. John Doe, Mrs. Doe, etc.)
- If your CRM uses ID references, include them in your lists so that you can match them with your CRM after the registration.
Reminders are OK!
Sometimes, the response rate to your invitation is not as high as you hoped. There are many possible reasons for this. Maybe the subject wasn’t catchy enough, the timing was not perfect, or the email got lost due to email overload. Don’t worry! It’s OK to send a reminder after 1 or 2 weeks. Save yourself a lot of time and use appropriate software to do this with a few simple clicks.
Make sure your invitee has the option to cancel the event! This will prevent you from sending reminders to those who cannot come.
Stay top of mind
An event communication flow typically takes three to six months. During this period, you want to stay at the top of your mind with your attendees. Notifying them about updates and news around the event increases the chance that the ones who registered will attend. The website analytics will tell you exactly how these notifications lead to more event website visits.
Last-minute communication
You have a last chance to tempt your invitees to attend the event. Send a text message (or email) letting them know you expect them. Include the link to the event website in the message so they have all the detailed information.
We advise you to check in your guests at the event. This enables you to see exactly who is present in the venue and who is still expected. An up-to-date list helps you follow up with a THANK YOU mail and a quick link for feedback. Knowing how they experienced the event and measuring your objectives is good.
Event software can help you automate the registration process and simplify your life. This vital part of your communication flow requires constant attention. You have to excite your target audience and stay top of mind to ensure they will attend the event. By keeping a close eye on registrations and responding adequately, you can enhance the success of your event!
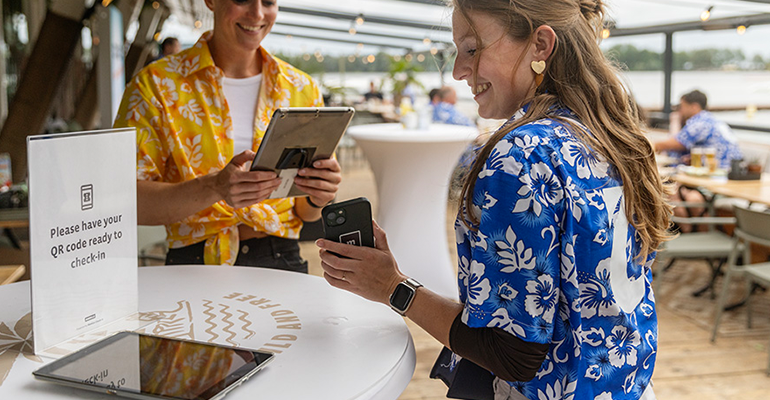
On-site registration: A smooth entrance without waiting lists
Waiting is the number 1 frustration for your attendees. Pay attention to the elements below to ensure the check-in during the event goes as smoothly as possible. After modelling them, do not forget to test. The devil is in the details!
Several elements require attention to ensure that the check-in during the event goes as smoothly as possible. We will discuss these below. After checking these, do not forget to test. The devil is in the details!
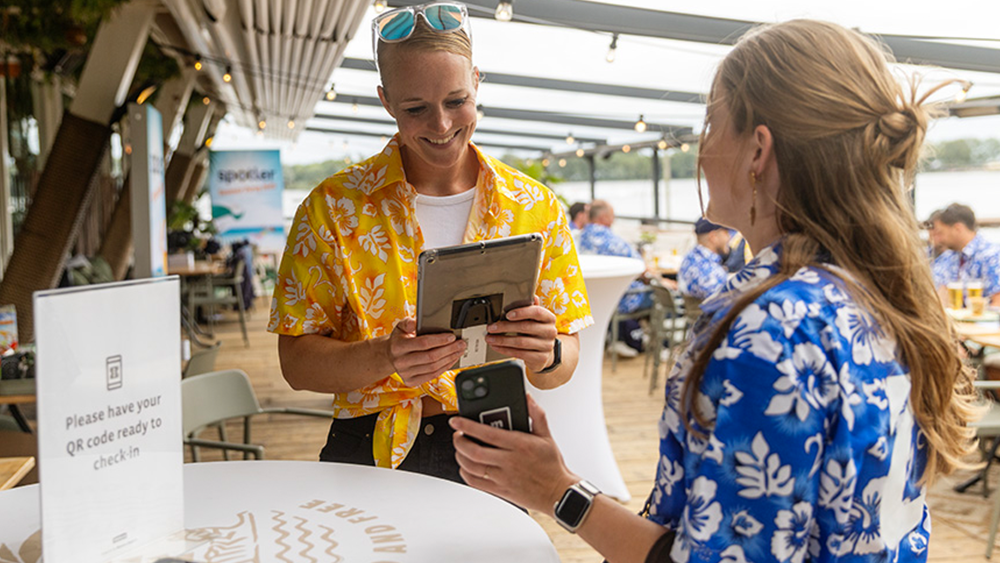
E-tickets
The registration confirmation includes an e-ticket that lets you check in your attendees on the event day. Remind your attendees to bring their e-ticket to the venue. Spotler developed a custom Check-in app for effortless attendee check-in. You can download it from the Apple App Store or Google Play Store (free of charge) and turn any smartphone into a scanning device.
After scanning the code, the attendees’ status will change from ‘registered’ to ‘present’ in your event software. This will be useful if you want to follow up with them after the event.
Registration desk tips
Setting up the registration desk requires adequate preparation: visualise the path that your attendees will walk when they enter the venue, and keep the following tips in mind:
- Set up the registration desk as wide as possible, with multiple check-ins to process many registrations at the same time;
- Create a separate registration desk for those who forgot to bring their e-ticket (manual check-in with a laptop);
- Place bold signage to avoid confusion.
Minimise the handling per registration
When you finish designing the check-in procedure, complete a walkthrough to determine its completion time. Minimising the number of actions will remarkably lower your attendees’ waiting time and the overall registration time.
Check-in points
Long waiting lines arise mainly because too few check-in points are available. The following formulas will help you calculate the necessary number of scanners:
First, calculate the total on-site registration time using this formula:
# actions * # seconds per action * # attendees
Example 1
It takes two actions to register, scan a QR code and print a ticket, which both take about 5 seconds. To do this for 600 attendees would take 2 * 5 * 600 = 6000 seconds. The total registration time then is 100 minutes, or 1 hour and 40 minutes.
Example 2
When the registration is a bit more complex, including taking jackets and providing instructions, you might consider five actions that would cost an average of 7 seconds per action. If you do this for the same number of attendees, you’re looking at 5* 7* 600 = 21000 seconds, or close to 6 hours.
Then, calculate the number of scanning points needed using the formula below (round up):
Total registration time (minutes)/ available walk-in time (minutes)
Example 1
100 minutes / 30 mins walk-in time = 3.3333
Number of scanning points required: 4
Example 2
350 mins registration time / 45 mins walk-in time = 7.7778
Number of scanning points needed: 8

On-site tips & tricks
- Ensure the internet connection (WIFI and cable) is stable and adequate.
- When using smartphones for scanning, ensure they are fully charged and keep chargers or power banks handy.
- Ask the attendees to prepare their e-ticket as soon as they enter the venue.
Name badges
Handing out badges is time-consuming, especially if you haven’t thought this process through. Ensure the badges are spread equally over the registration desk to avoid long queues. Use clear signage so your attendees know where to pick up their badges – and reserve an extra desk for press and VIPs. Printing badges on-site requires a lot of extra time. If you choose to do this, ensure enough printing points are available and develop a backup plan in case technology fails (e.g. extra printers).
“Minimising the number of actions will remarkably lower the waiting time for your attendees – and the overall registration time”
On-site registration is an important element of your event; your attendees’ experience starts here! People will not remember a smooth registration process… but will not easily forget endless queues.
To manage on-site registration flawlessly, you’ll have to think through all touchpoints and handlings and test the complete process before sending an invitation. A well-designed on-site registration will make your guests feel welcome.
Spotler makes event registration easy
The Mail, Registration, Website, Tickets, and Survey modules enable event professionals to automate the complete registration process of B2B events. Spotler helps you save up to 75% of your time without technical knowledge. Spotler suits small and large events, from conferences to training, business meetings, or product launches.