


Here’s the situation. From January 2025, Microsoft caps every Exchange Online user at 2,000 external recipients in any rolling 24-hour period. That applies across the board, regardless of your subscription tier.
Sounds generous, until you actually send mail for a living. A retailer firing off a single promotional campaign to a 10,000-name list blows through that cap in one go. So does a school emailing parents and students, or an agency running several clients’ newsletters out of the same tenant. Once you’re over the limit, Microsoft doesn’t gently ask you to slow down. It throttles or blocks the excess until the 24-hour window resets, and your campaign, your shipping notifications, or your client’s newsletter simply sits there. Delayed. Or worse, never delivered.
How SendPro helps
This is where SendPro earns its keep. Rather than sending mail out through Exchange Online’s own path (and straight into that 2,000-recipient ceiling), you route it through SendPro instead. Exchange stays exactly where it is, as your mailbox and authoring layer. SendPro becomes your actual sending infrastructure.
The mechanism behind this is a direct SMTP connection from Exchange to SendPro, authenticated with a custom header rather than the usual username-and-password or IP allow-list approach. Because SendPro is treated as an external source for that outbound mail, none of Exchange Online’s own sending limits apply.
It’s worth knowing that this particular connection method is genuinely unusual. As far as we’re aware, SendPro and SendGrid are the only providers that can connect directly to Exchange/Office 365 this way, with no extra middleware and no development work required on your side. Everything below is configuration, not code.
Before you start
You’ll need:
- A SendPro account, with permission to configure sending domains and create sources.
- Access to your DNS provider for the sending domain (you’ll be adding a few records).
- Exchange admin access, specifically to Mail flow, Connectors and Rules in the Exchange Admin Center.
Set aside about an hour, mostly for DNS to propagate. The actual configuration takes a few minutes.
Step 1: Configure your sending domain in SendPro
In SendPro, add the domain you’ll be sending from (your “From” domain, for example yourcompany.com). You don’t need to configure anything for individual From addresses; once the domain’s authenticated, any address on it will work.
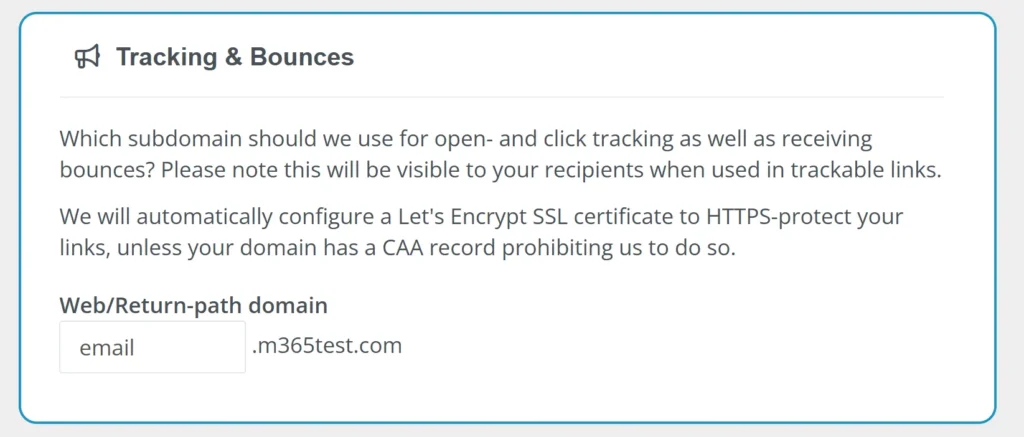
Next, choose the subdomain SendPro should use for open and click tracking and for receiving bounces (something like e.yourcompany.com). Bear in mind this subdomain will be visible to recipients in any trackable links, so pick something you’re happy for people to see.
SendPro will then give you a short list of DNS records to add at your provider:
- A CNAME for the tracking subdomain.
- Two CNAMEs to authorise SendPro’s DKIM keys.
- A DMARC TXT record, with
ruaandrufaddresses pointed at SendPro, so you actually receive DMARC aggregate and forensic reports (fair warning: forensic reports include message content, so know that before you turn it on).
Add these, then wait. DNS propagation usually takes around an hour. Once everything shows as verified in SendPro, you’re ready for the next step.
Step 2: Create your SMTP source
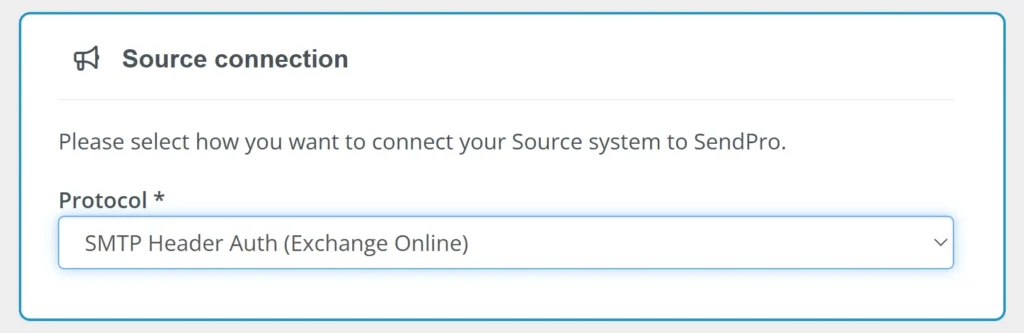
Still in SendPro, head to Setup, then Sources & API, and create a new SMTP source using Header Authentication. This generates the credentials Exchange will use to authenticate to SendPro.
Two things worth flagging here. First, the credentials are shown once and once only, so copy them somewhere safe before you close that screen. Second, note the SMTP host SendPro gives you for this source; you’ll need it twice in the next step.
Step 3: Build the connector in Exchange Admin Center
Over in the Exchange Admin Center, go to Mail flow, then Connectors, and add a new connector.
Work through it as follows:
- Connection from: “Your organisation’s email server”. Connection to: Office 365.
- Name it something sensible, like “SendPro”.
- Use of connector: choose “Only when I have a transport rule set up that redirects messages to this connector”. Don’t apply it to all mail; you want this connector used only for the traffic you deliberately send through it.
- Routing: enter the SMTP host SendPro gave you as the smart host.
- Security: tick “Always use Transport Layer Security (TLS)”, and require a certificate issued by a trusted certificate authority, matching the smart host’s domain name.
- Authenticating sent email: verify by certificate subject name (matching that same smart host domain), rather than by IP address. This is the step that lets Exchange authenticate cleanly to SendPro without any IP allow-listing at all.
If Exchange prompts you for a test address to validate the connector, use the test address SendPro provides in your account. Review and create the connector.
Step 4: Add the transport rule
A connector on its own does nothing. It only fires when a transport rule tells it to. Go to Mail flow, then Rules, and add a new rule, something like “Route external mail via SendPro”:
- Apply this rule if: the recipient is located “outside the organisation”, and the sender is located “inside the organisation”.
- Do the following: redirect the message to the following connector, and choose the SendPro connector you just created.
- And: modify the message properties to set a message header. This is where the header authentication actually happens: set the header name (SendPro will tell you which one to use) to the credential value you saved back in Step 2.
Save the rule.
Step 5: Test it properly
Send a test email from within your organisation to an external address. Then go and check your SendPro dashboard. You should see the message logged and delivered there, not just in Exchange’s own message trace.
Don’t skip this. A connector and rule that look correct on paper but are silently misconfigured (wrong header name, mismatched certificate domain) will usually fail quietly, so a real end-to-end test is the only way to be sure.
A quick word on internal mail
There’s a related, separate use case: routing mail between internal senders and recipients through SendPro, so it’s marked as internal, skips spam filtering, and doesn’t trigger Outlook’s external-sender warning banner. This uses certificate-based authentication rather than the header method above. At the time of writing, it’s achievable by hand but isn’t yet a polished, self-service flow, so treat it as a “talk to us first” scenario rather than something to configure solo from this guide.
If something’s not working
A few common roadblocks, in order of how often they actually happen:
- DNS not fully propagated. Give it the full hour before assuming something’s broken.
- Certificate subject mismatch. The domain name in your connector’s security settings has to match the smart host exactly.
- Header name or value typo’d in the transport rule. This is the single easiest thing to get wrong, since it’s a manual copy-paste from a credential you can only see once.
- Transport rule conditions too broad or too narrow. Double-check “internal to external” is set the way you intend; get it backwards and nothing external ever routes through SendPro at all.
And that’s it. Once it’s wired up, your outbound Exchange mail simply stops being subject to Microsoft’s recipient cap, because as far as Exchange Online is concerned, it’s no longer Exchange Online sending it.
Interested in seeing our Exchange integration in action?
We’ll walk through your setup, answer your questions before they become problems, and show you what SendPro looks like once it’s actually running your outbound mail.